Thursday, May 23, 2019

Rotoscope -movie clip


Rotoscoping - a movie clip

using Photoshop – based on – with additions - 


1. FILE -OPEN a movie file
2. Click on the timeline menu
3. Choose ‘Allow frame skipping’
4. Choose ‘set Timeline Frame Rate’ – change to ‘3’ adjust as necessary
-the frame rate determines how many frames need to be Rotoscoped-
5. At bottom of timeline - Slide ‘control timeline magnification’ to the far right
6. Find the section of movie you wish to Rotoscope
a. Drag ‘set start of work area’ to start spot of your movie
b. Drag ‘set end of work area’ to end spot of your movie
7. At the beginning of your movie – export –quick Export a PNG
8. Choose FILE – Place Embedded – find the snapshot of the first frame you just made
9. Right click on this layer - Rasterize layer
10. Use the lasso tool and loosely draw around the items you wish to Rotoscope – 1 at a time
11. EDIT –FILL –Content Aware
12. This creates a nice empty background over which you will over lay your Rotoscoped layers
13. HIDE this layer for now

Create a layer to Rotoscope on.

14. Add a new video layer
a. Layer – Video Layers – New Blank Video Layer
b. Note- in timeline- Layer 2 is now beside Layer 1
15. Grab and move the new layer ABOVE- VIDEO Group 1
a. Note- in timeline- Layer 2 is now ABOVE Layer 1
16. Drag Layer 2 – in timeline- to match the same start point as Layer 1 (the movie)
17. Rename this layer ‘Rotoscope’

Draw the moving objects (rotoscoping)

18. At each frame draw and fill the moving parts of your video
19. Do not forget the details such a clouds, water etc

Add a title layer

20. Write in a title, your name, and the date
21. Extend the back ground beginning and end by 1 frame
22. Adjust the size of the title layer to match the start and length of the extended background start spot.

Import music

23. Click on the music track – import audio
24. Adjust to fit your sequence

EXPORT

25. Export an animated gif
     a. FILE –EXPORT –Save for Web (Legacy)
26. Export a movie
     a. FILE –EXPORT – Render Video


use this MOVIE LINK - get the same clip


Original movie - Dog's at Play


Original Movie - sequence clipped out

Rotoscoped Animated Gif -Dog's at Play

Rotoscoped Movie Clip - Dog's at Play


Original Clip with Rotoscoped Clip -movie

Original Clip with Rotoscoped Clip -animated gif
----
Now choose your own movie clip
Do it again
-the WHOLE clip should be animated - including the background-
-explain - in detail - how to rotoscope using Photoshop-


Friday, May 17, 2019

SketchUp -OnYourOwn -Tiny Home -Assignment 7


SketchUp -OnYourOwn -Tiny Home

 Use enough screen shots to show all your work 

FIRST: go to the 3D warehouse - get a flat deck truck trailer - to build on top 

  •  carefully remove the front 1/3 of the trailer 
PLEASE CUT OFF 1/3 
DO NOT JUST SHRINK IT


  •  add pull out window to the hidden side and french doors to the back 
  •  add your name 


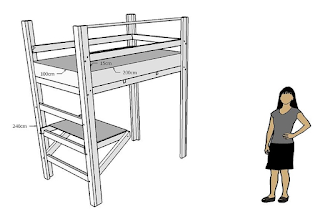
SECOND: build this bed - put it inside the trailer house 

  •  colour it 
  • add your name 


THIRDBack yard ski ramp  build the ramp -place it such that a car can be parked on top of the trailer - add a car 

  •  paint it 
  •  add your name 


 Place this at an airport pulled by an 'airstairs' truck surrounded by a chain-link fence that YOU made - think components 


https://www.facebook.com/PADTinyHouses/

Wednesday, May 15, 2019

SketchUp -Room with Pool -assignment 6

SketchUp Room with Pool

Follow the PDF tutorial

add:

  • paint
  • windows (8)
  • decor  (chairs - tables - couches)
  • remove erroneous lines
  • your name

  • note: for Steps and Railing Components


select 
  - choose move tool 
    - hold CTRL key 
      - move diagonal 
         - type 9/

-same for the railing  note /9 and /50


This shows the draw elements with windows but without the decor

Pool - windows - stairs - railing - name

hole in floor - steps to pool

Build a railing around the bottom floor too!


Monday, May 13, 2019

SketchUp - Garage Sale -assignment 05


SketchUp -Garage Sale


Create a Garage Sale 

1. Save your SketchUp projects - as .skp files 

  • Click on the FOLDER next to SAVED 
  • Choose Download then 2018

2. Create a New model 

Add the house - [INSERT-your computer] create a driveway, create a yard of grass - add a fence from the 3D warehouse 


3. Add your dog house to the yard -get a dog 

4. Place your Fishtank TABLE in the garage 

5. Now for the Garage Sale 

  • get 3 tables from the 3D warehouse 
  • place 1 inside the garage with the fishtank table 
  • place 2 tables on the driveway 
  • draw a Garage Sale sign 
  • add 3D Warehouse items to the tables 
  • add 3D Warehouse items inside the garage
  • add 3D Warehouse items onto the driveway
  • keep everything TIDY and ORGANIZED 
  • Shrink down your ROOM and place it on a table 

Garage sale ideas: Tools, Furniture, kitchen items, garden tools, shoes and handbags, jewelry, books, appliances, camping gear, exercise equipment, toys


Thursday, May 9, 2019

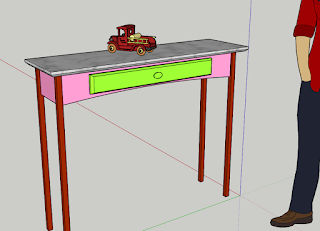
Sketchup -Getting Started -Part 4 -Table with Fishtank

Sketchup -Getting Started -Part 4 
(Groups and Components)


  • Groups prevent new edges from merging with the group
  • Groups and copies of groups are unique
  • All copies of components are linked


Move the man diagonally over to another quadrant but keep him in view.


  1. Place a single drawer on the opposite side
  2. Draw a rectangular fishtank on top - add (at least 4 different) 3DWarehouse fish
  3. add your name


Single draw side - you should have a fishtank 


two drawer side - you should have a fishtank - Name


Wednesday, May 8, 2019

Sketchup -Getting Started -Part 3

Sketchup -Getting Started -Part 3


Do this: Your computer room

walls - painted and textured
floor - textures
windows - trim painted - glass painted
add your name


from the 3D Warehouse

 -desk - gaming chair - rug - fridge - hottub - couch - big screen TV - chandelier + more!

Note: the name - the 3 windows - all the different textured walls - nothing outside the boundaries


Tuesday, May 7, 2019

Sketchup -Getting Started -Part 2

Sketchup -Getting Started -Part 2


Do this - add more - do not do less:
add captions to all your post images


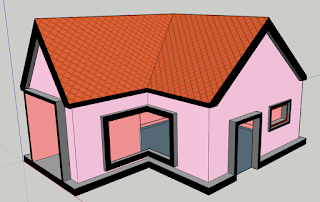
note peaked roofs-corner window -garage -painted offset and pulled trim -tiled roof house - removed windows and doors

door inside garage -painted trim and inside walls

round corner window - offset and pulled - painted trim

Thursday, May 2, 2019

Sketchup -Getting Started -Part 1

Sketchup -Getting Started -Part 1

Chrome may crash "Aw Snap" - if so switch to Firefox


https://www.youtube.com/watch?v=pv7TrGnZ17w


DO THESE using SketchUp Web


first do the tutorial - then do the assignment

PART 1  - draw a dog house - leave the man in the model

  • no higher than shoulders - no lower than knees
  • add a window and door to each side
  • only the front door has steps
  • 2 chimneys - painted as brick
  • paint the doors with a wood material
  • paint the windows with glass or a window covering
  • paint the walls and edges
  • add your name to the model

use the snipping tool to post your model
use enough images to capture all 4 sides


Front of house - note - steps
Note: the name features on every wall
- the inside is painted too